
Quick Summary (1-minute scan)
Data center physical security works best when it is built in layers that all support the same outcomes: controlled entry, clear accountability, and fast investigations.
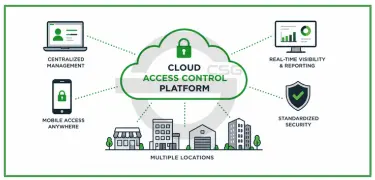
Data centers are engineered for uptime, but uptime depends on more than redundant power and network paths. Physical security has to run like an operations program, not a one-time install. When access control, video surveillance, and day-to-day procedures are designed together, you get fewer gaps, cleaner investigations, and fewer “small” issues that quietly grow into larger incidents.
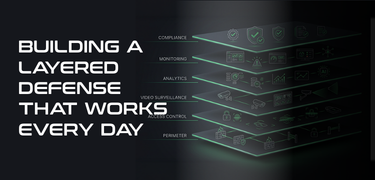
A helpful way to think about physical security is to treat it like a series of rings that tighten as you move toward critical assets. Each ring reduces risk, increases visibility, and narrows the scope of what can go wrong.
The layered model (the big idea)
Think in rings of protection that get tighter as you move toward the most sensitive areas:
- Perimeter and site entry
- Building envelope
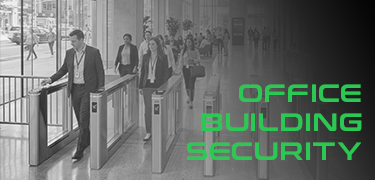
- Lobby and visitor control
- Secure transitions (mantraps and anti-tailgating)
- Data hall approach (interior zoning)
- Cages, cabinets, and racks
- Monitoring, response, and escalation
- Audit trails and continuous improvement
The goal is not to make entry impossible. The goal is to make entry controlled, observable, and explainable. If an auditor, customer, or internal leader asks “How do we know who accessed this area and what they did?”, your systems and procedures should answer that without a scramble.
What this layer protects against
- After-hours intrusion and reconnaissance
- Vehicle-based threats at gates and perimeter roads
- Unauthorized entry through low-visibility paths (side gates, fence lines, loading routes)
How access control helps
- Gate control with assigned credentials (badge, mobile credential, PIN, or multi-factor where warranted)
- Time schedules and role-based permissions (vendors vs employees vs escorts)
- Exception handling for lost badges, temporary access, emergency entry
How video helps
Perimeter cameras should do more than “show an area.” They should support identification and timeline reconstruction.
- Coverage on:
- Vehicle gates (inbound and outbound)
- Pedestrian gates
- Perimeter fence lines and choke points
- Parking and walk paths to the building
- Vehicle gates (inbound and outbound)
- Cameras positioned to capture faces and license plates, not just wide scenic angles
Procedures that make it work
- Gate failure workflows: who is called, how entry is confirmed, how the event is logged
- Delivery rules: where trucks stage, who meets them, what gets checked, what gets recorded
Operational tip
If you track only one thing here, track after-hours gate exceptions. These patterns often reveal process gaps, shared access, or weak change control before a more serious incident occurs.
Access control priorities
- Controlled access on all exterior doors, not just the lobby
- Hardware aligned with policy (fail-safe vs fail-secure decisions documented)
- Door position monitoring to detect “held open” conditions
Video priorities
At doors, you want footage that supports accountability. That means showing approach, credential use, and door state.
- Views that show:
- The person approaching
- Credential use (or the absence of it)
- Door state (open/closed)
- The person approaching
Loading docks deserve extra attention because they have legitimate high-traffic workflows that create opportunities for bypass and confusion.
Procedures
- “No prop” rules that are realistic for operations
- Clear ownership: who is responsible for dock security during delivery windows
- Maintenance rules: what happens when a door closer fails or a strike is misaligned, and how quickly it gets fixed
Practical thought
Most “held door” alarms are not malicious. They are often caused by workflow friction. Treat them as design feedback, then adjust procedures or hardware so the secure way is also the easiest way.
Access control
- Keep visitor access outside the secure perimeter
- Create visitor roles that are time-bounded and location-bounded
- Prevent visitors from using self-service access to interior zones
Video
Lobby video should support verification and timeline reconstruction.
- Coverage for:
- Reception interactions
- Visitor badge issuance
- Entry points into secure areas
- Reception interactions
Procedures
- Visitor identity verification standards (what IDs are accepted, what gets logged)
- Escort rules (who can escort, where escorts are required, what “line of sight” means)
- Vendor check-in workflows that do not “skip steps” during busy periods
Operational tip
If a visitor can reach a secure door without crossing an observable checkpoint, you have a design gap. Solve that with a mix of layout, access rules, and staffing.
Access control
- Mantraps with interlocks so only one door can open at a time
- Rules that flag suspicious patterns (credential sharing, unusual access sequences)
- Documented exception rules (ADA, equipment moves, emergency egress)
Video
Tailgating prevention is stronger when video supports quick confirmation.
- Views that confirm:
- Single-person entry
- Door state transitions
- Tailgating attempts and “near misses”
- Single-person entry
- Pair video to door events so operators can review without hunting
Procedures
- Define what happens when tailgating is suspected:
- Who gets notified
- When it is stopped live vs reviewed later
- How it is documented and closed
- Who gets notified
Design caution
A mantrap that staff routinely bypasses creates a false sense of control. If operations need carts and equipment frequently, design for that workflow so the secure path is not a hassle.
Access control
- Create zones for:
- Shared corridors
- Staging areas
- Data hall entry points
- Support spaces (MDF/IDF, mechanical rooms, security rooms)
- Shared corridors
- Apply time schedules and approvals that match actual work patterns
- Separate permanent access from task-based access
Video
Interior cameras should support attribution at zone boundaries.
- Coverage at doors separating:
- Office space from operations space
- Operations space from data hall space
- Office space from operations space
Procedures
- After-hours access approvals and documentation standards
- Contractor workflows, including badge return and deactivation
- Project closeout audits so temporary access does not linger
Operational tip
Zoning is not about distrust. It is about clarity. When access is tightly defined, investigations get faster because fewer people could have been in a given place at a given time.
Access control
- Cage-level access with clear permission management
- Temporary access windows tied to work orders
- Stronger controls for higher-risk spaces, including multi-factor where appropriate and feasible
Video
Cage and cabinet security needs camera views that show activity, not just presence.
- Views that capture:
- Cage entry
- Work being performed (as reasonably as privacy and practicality allow)
- Movement in and out of restricted aisles
- Cage entry
Procedures
- Asset handling rules: what requires a ticket, what requires two-person presence, what gets logged
- “Break glass” access policies: who can authorize, how it is recorded, how it is reviewed afterward
Practical thought
If a customer asks “Who accessed our cage last weekend?”, you should be able to answer with both access logs and supporting video without manual detective work.
What “good” looks like
Operators should be able to answer quickly:
- What happened?
- Where did it happen?
- Who was involved?
- What should we do next?
- What do we document?
Access control and video working together
- Door events should jump directly to relevant camera views
- Standard event categories:
- Forced door
- Held door
- Invalid credential
- Tailgating suspected
- Forced door
- Clear rules for when an event becomes an incident
Procedures
- Escalation paths by severity and time of day
- Response runbooks for:
- Door forced/held
- Tailgating
- Visitor violations
- Loss of camera coverage in a critical zone
- Door forced/held
- Regular drills so teams know what “normal response” looks like
Operational tip
If you only review alarms when something feels urgent, you will miss patterns. Pattern recognition is how you prevent repeats.
Audit trail essentials
- Access events, permission changes, and badge lifecycle events (issued, replaced, deactivated)
- Exception logs (escort exceptions, after-hours approvals, emergency overrides)
Video retention and evidence
- Retention should match:
- Incident discovery timelines
- Contractual obligations
- Investigation patterns
- Incident discovery timelines
- Evidence export workflows should be defined:
- Who can export footage
- How chain of custody is maintained
- Where evidence is stored
- Who can share footage externally
- Who can export footage
Continuous improvement
Monthly reviews should identify recurring issues and drive changes:
- Door trouble spots
- Tailgating hotspots
- Badge exception patterns
- Camera uptime gaps
- Training gaps for escort and visitor workflows
Practical thought
A security program improves when you treat “minor issues” as signals. A door that is held open daily is not a nuisance. It is a design problem waiting to become an incident.
A practical rollout sequence (that avoids rework)
A layered program fails when tools are installed before workflows are defined. This sequence helps you avoid that.
- Define the threat model and critical assets
- Map zones and entry points, then assign required controls by layer
- Set procedures first, then configure systems to match them
- Install and commission with scenario-based testing, not just device checks
- Train and drill response workflows
- Launch KPI reporting and assign ownership for monthly reviews
- Refine based on findings (hardware, camera views, policies, staffing)
Common failure points to watch for
These are issues that show up repeatedly in real environments. They are usually “process + design” problems, not product problems.
- Shared credentials because it is faster
- Visitor bypasses during busy periods
- Mantrap workarounds for carts and equipment moves
- Retention mismatches (policy says one thing, storage delivers another)
- Alert fatigue from too many low-quality events
- No owner for access reviews, so access only grows
Recommended internal links for this spoke
To support your hub-and-spoke structure, link:
- Back to the hub: your data center / critical facility security hub page
- To related solution pages:
- Access Control (mantraps, anti-tailgating, audit trails)
- Video Surveillance (retention sizing and coverage planning)
- Managed Services (monitoring workflows, SLAs)
- Access Control (mantraps, anti-tailgating, audit trails)
Security Integrations (commissioning, event-to-video workflows)


.png)


